
Drawing & Making

Introduction to Adobe After Effects
(exercise 1)
In the first lesson of the new semester, we dabbled into the basics of adobe after effects, which was very new to me, coming from a background with little experience with animation software. We learned how to understand the main interface and the different features the software offers, especially some familiar ones such as pen and shape tools.
Understanding the interface was pretty easy for me, and the path tool to create motion was really cool, where there are endless possibilities for the type of movement u want the shape/image to portray in the scene. However, I might need waaay more practice on how to make such animation way smoother.
Though there were also lessons on how to manipulate the colours with colour grading and effects, which were a little bit tricky for me to understand. In the end, it was worth it being a challenge seeing the end result (giving me slight epilepsy-core).
Understanding Keyframes
(exercise 2)
On this lesson, we learn how to understand and apply keyframes, which based on my understanding, were timestamps with specific tools and settings within certain frames.
After making a shape and path, we learned how to change the form, shape, and positions of the layers in specific frames, and I realized how massive the effort it took just to create a certain effect within 1 second.
My first exercise had a concept of passing clouds, which I thought was simple enough. However, after testing the first few clouds, it looked too stiff and gives more of a "worm" feeling rather than a fluid cloud.
With this, we learned a way to make the animation "smooth" called "Easy Ease". Activating this not only helped give a smoother effect but can be manipulated with a graph-looking tool, to change the pace of the animation.
Though the end result of the passing clouds animation test wasn't like what I desired, I managed to learn and understand the main workflow.
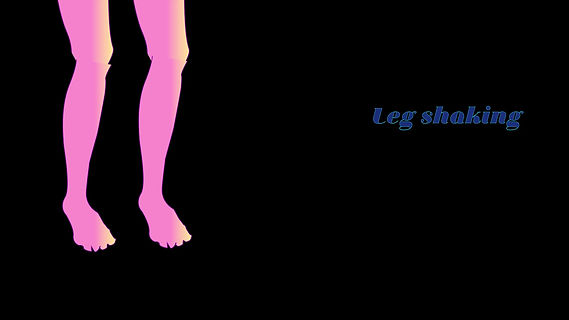
With the past lessons in mind, my group and I were tasked to create a graphic visual of our group identity. Our group chat name is "break a leg" as we couldn't think of other names. Therefore, we made a graphic sketch of a leg and imported it into AE.
I tried out how to execute the concept of shaking legs by setting "rotation" keyframes, though I also had to add in "position" keyframes so that the bottom part of the legs did not look so disjointed.
Overall, I managed to give the effect that I wanted but was not really that satisfied.


Applying Different Effects & Learning How to make Chrome Text (exercise 3)
For this particular lesson, we learned how to make a chrome visual on texts, based on the reference photo. I did not realize that there were quite a few steps just to achieve this particular look, with the gradient setup, placing it into a proper position and adding an effect to complete the look, which failed for me because I chose a different font and color range to play with, thus needing to modify the setup.
We are also introduced to a much larger variety of effects that we can apply to different layers. We learned about effects such as "Twirl", "Turbulence" and many more. It gave a really cool swirly effect, especially with the gradient colors mixed in together.
For today's exercise, with all the past lessons in mind, I wanted to create an animation of a cool egg being fried, so I added keyframes on "Path" settings to change the shape of the egg white as if it was being fried. I also added the same turbulent and twirl effects to give a flame look.
Importing PSD Setup & Parallex Animation (2.5D)
(exercise 4)
For this lesson, we learned an extra setup required from another software called Adobe Photoshop to create layers that are masked on certain areas that we want to animate before importing them into Adobe Effects.
For the test exercise, we learned how to extract the subject, which in this case, is the whale and the diver, and separate the oceanic background. Using the quick way of the "Object Selection" Tool to pick out the subjects and "Content Aware Fill" to fill in the oceanic background to its fullest.
After importing them, we learned a new feature of Adobe Effects called "Camera", in order to give a 2.5D feel. I found this feature to be the coolest so far as how we can move the camera in its "XYZ" form (even though I'm mathematically inclined) as if we are shooting at the actual ocean. We also learned other cool features such as "Push Pin", which brings movement to the whale and diver, as if they are swimming.
For our own exercise, I decided to bring in an image of my favorite animes of all time, "Shingeki no Kyojin" and try to bring out the tension and focus between Eren and the Colossal Titan in the midst of chaos. I was taught the Null method, which helps to stabilize the camera further when focusing instead of warping everywhere. As for the final touches, I used the "Burn" filter and flaming effects.


Starry Night & Group Brand Animation (exercise 5)
For the next exercise, we learned how to make a starry night with the blinking stars as well as the shooting stars with different settings and the classic "Path" tool for the shooting star.
Moving on to the majority part of the lesson, which was my group and I created a brand animation that best describes our philosophy, in which we used our expanded motif for animation before transiting into our brand logo at the end. We tried playing with the everyday motions in real life, such as the clock with time as well as the blooming flower, to bring the expanded motif to life, with everything we have learned, and with simple animations.
Introduction to Lenticular Lenses
(exercise 6)
After being equipped with some animation skills in Adobe After Effects, we learned another form of animation, except in a physical form, called "Lenticular Lenses". My general understanding was about the LPI needed to be matched with the correct settings for it to work. there are also different types of Lenticular Lenses, which can be viewed in different modes.
I went out to take pictures of the cat statue outside the campus in 12 frames and imported them into Photoshop to start the manual method of creating our own Lenticular Lenses.
It was definitely not my thing to take photos due to my constant shaky hands so definitely the test animation between the taken frames was not so smooth. Though, the process of editing in the frames in Photoshop wasn't really that difficult for me as the use of the "Timeline" and aligning the photos based on a single focal point was pretty easy in my book, even if I had to readjust a few times. All in all, it was so interesting to learn and find out about this new form of artwork and I am definitely excited to apply it into my group projects and individual project.


Group Lenticular Lense Animation (Test)
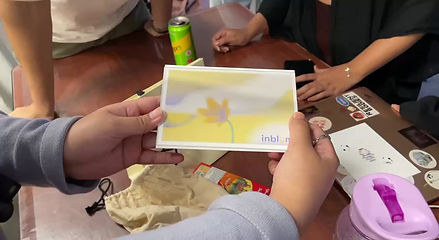
After learning the basics of creating our own lenticular lense animation, me and my group definitely thought of a concept that is simple yet effective in conveying our group philosophy within 12 frames. We had a concept of a subtle animation of a blooming flower as it ties with our slogan "Your Space, Your Pace" and the slow yet steady blossoming process.
We weren't sure about the different forms of blossom within a flower so we took a reference from a time-motion video online and created our own visuals from there.
Along with the updated visual graphics and branding from the previous session, we drew out 12 frames of different flowers in different stages, which took us FOREVER as implementing each petal's physics and physical form into visual is difficult. In the end, we managed to complete it successfully and we are hella proud of the test print as we first aligned it with the test lens.
Learning and understanding that our graphics adhere to our brand guide and still contain enough clarity to spread the message, we went to modify the visuals of them in portrait format as per the class's final decision. We wanted to add minor details such as people walking in choppy, jumping frames to insinuate time passing by around the flower fast while the main subject of the flower itself is blooming slowly.
Making the animation for the people in the modified visuals isn't too challenging for us, considering we learned our lesson previously.